

Nextin Setup Guide: Using Firefly on iOS
Nextin is an iOS client built on the Clash (Mihomo) core, with one standout feature: it’s free to download — unlike comparable clients such as Shadowrocket, which charge just to get it onto your phone. This guide walks through the whole process from download to your first successful connection, with a screenshot for every step.
Before you start
Two things to confirm first:
- You already have a plan with a provider that supports Nextin (Firefly does), or you have a subscription link you can get hold of. Either works, but your provider needs to actually support Nextin — if you’re not sure, it’s worth a quick message to support before you start.
- A non-mainland-China Apple ID. Nextin isn’t listed on the China App Store storefront, so you’ll need an Apple ID registered outside mainland China to download it.
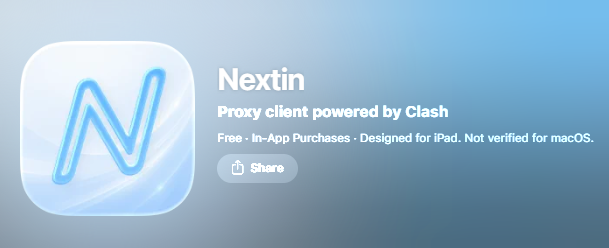
Search “Nextin” on the App Store and look for this listing — “Proxy client powered by Clash”:
Step 1: Download and open Nextin
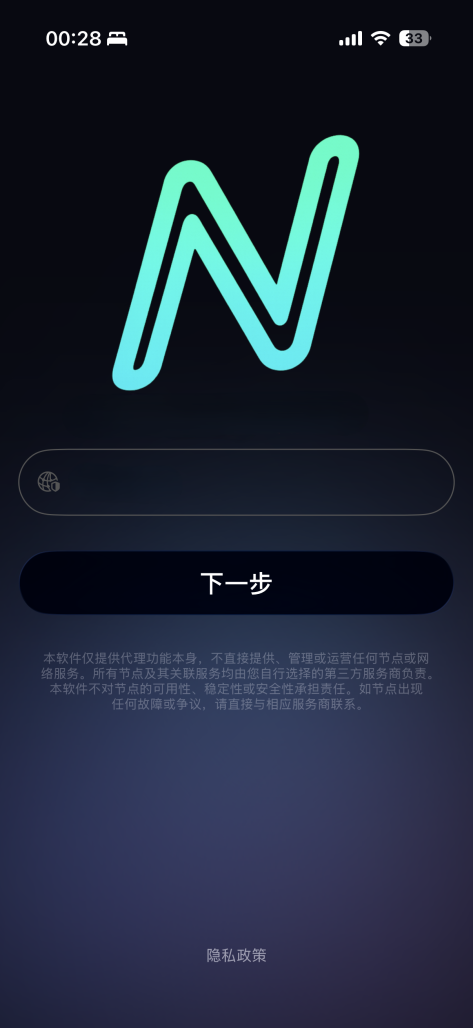
Sign into the App Store with your non-China Apple ID, search for and install Nextin, then open it to reach the home screen below. This is where a lot of people pause — the home screen doesn’t show many options at first glance, but the next step is the important one.
Step 2: Choose how you’re connecting
The home screen offers two paths, depending on what information you have from your provider:
Option A: Reference code
If your provider has a reference code registered with Nextin — Firefly does — type firefly (no quotes) into the field on the home screen and tap “下一步” (Next). This takes you to a login screen.
Option B: Subscription link
If you already have a subscription link from your provider, paste it into the corresponding field and tap “下一步.” This takes you straight to the dashboard — no separate login step needed.
Note: Either way, this only works if your provider actually supports Nextin. If the app doesn’t recognize what you’ve entered or the flow doesn’t behave as expected, check with your provider’s support rather than repeatedly retrying.
Step 3: Log in (reference code path only)
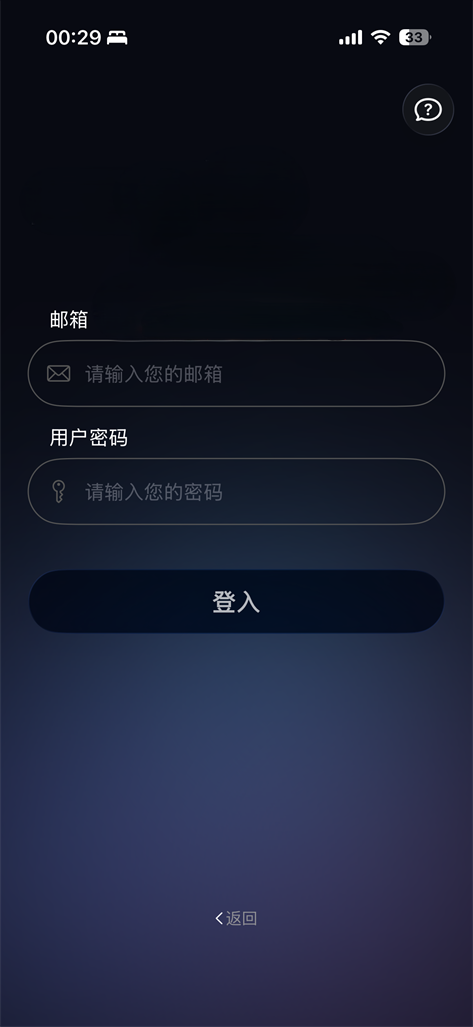
If you went with the reference code, this step asks for your provider account credentials — the same email and password you already use to log into your account directly. For example, if you signed up for Firefly with [email protected] and a password you chose, enter that same email and password here. There’s no separate account to create.
Step 4: Connect and pick a node
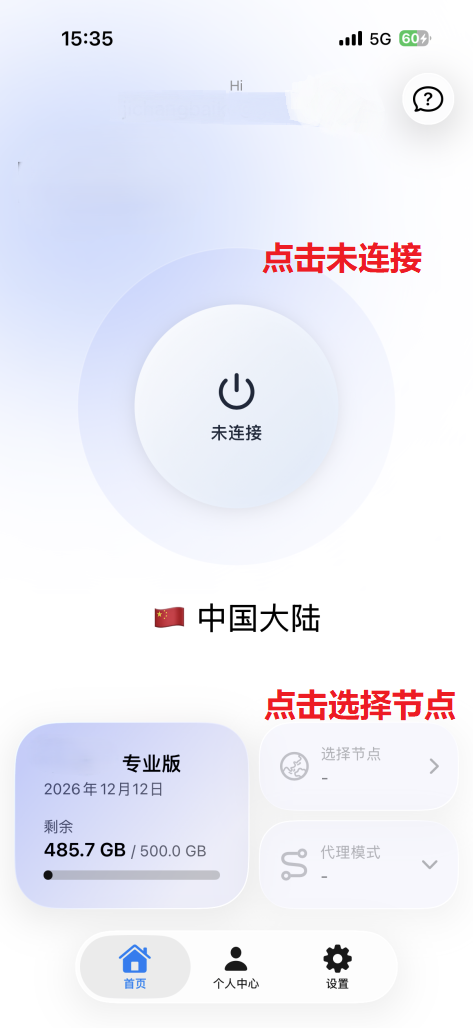
Once you’re in, you’ll land on the dashboard. Tap the large power button in the middle, then tap “选择节点” (Choose Node).
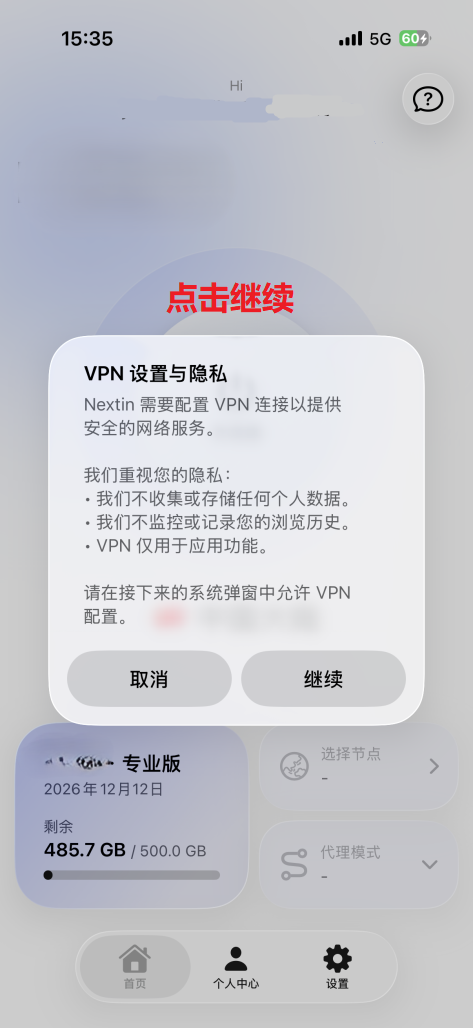
A privacy notice appears next — read it and tap “继续” (Continue).
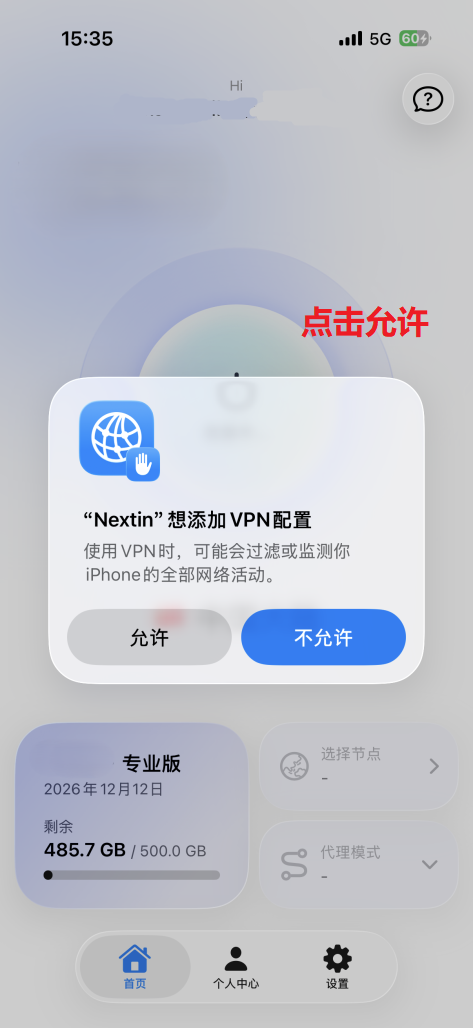
iOS will then prompt you with its own system dialog, “‘Nextin’ Would Like to Add VPN Configurations” — tap “允许” (Allow). This is a normal iOS system permission request, not something specific to Nextin or your provider.
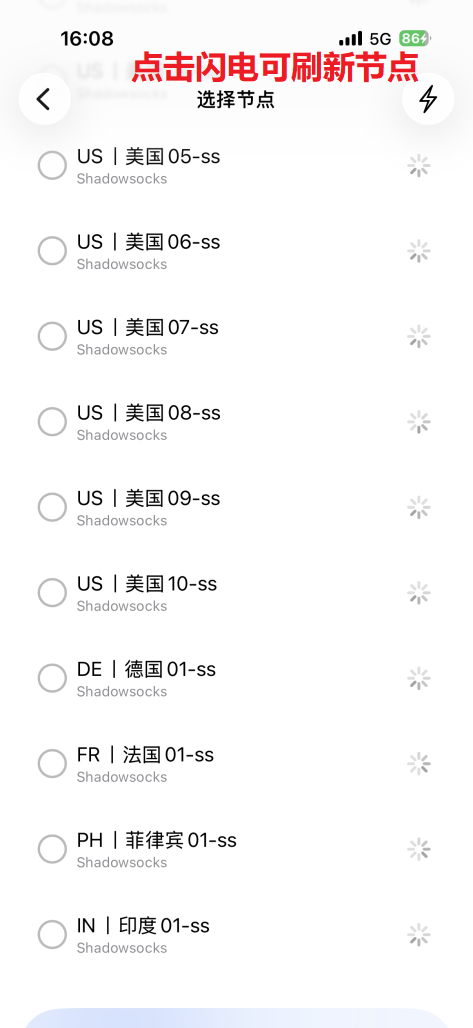
Finally, pick a node from the list — once it connects, you’re online. The lightning-bolt icon in the top right refreshes the node list if one isn’t connecting or you want an updated latency reading.
The short version
The whole flow is really just: pick a connection method → log in or import your subscription → allow the VPN permission → choose a node. The first setup takes a few minutes while you get used to the interface; after that it’s a one-tap connect going forward. If something doesn’t work at any step, it’s almost always a provider-side compatibility question — worth checking with support directly rather than troubleshooting blind.